

Since becoming a mother, I’ve found myself looking around my home wondering, is this really the healthiest place for my growing family? I’ve started to look at the cleaning sprays under my sink, the plastic dish pods that explode into microplastics all over our dishes and the thick gooey substance I pour over our clothes in a whole new light. This newfound awareness lead me down a journey of reevaluating some of the products I have been using and the overall methods I’ve been practicing in my everyday cleaning. I started to wonder how these have been affecting not just our health, but also the health of the planet I will one day leave behind to my children.
One of my first realizations were the many toxins that are hidden in everyday cleaning products, even the ones that were labeled “green” or “natural”. I wanted to feel good about what I was spraying on my kitchen counters, floors, and even my toddler’s highchair. Especially the products I was keeping around my daughter who loves to help me clean. But I kept running into the same frustration, many of the “non-toxic” sprays didn’t actually work. So, I went down a rabbit hole of researching how I can make some of my own products that actually worked and how I can feel better about the impact I was having on the planet. Below are 5 cleaning improvements I made that have brought me more peace of mind, less waste and a cleaner, healthier home.
Natural vs Non-Toxic – Disclaimer
I’ll start off by acknowledging the fact that just because a cleaning ingredient is “natural”, it does not mean that it’s “non-toxic”. That’s because something can be considered toxic if it can cause any type of irritation. For example, Borax and washing soda (used in home-made laundry detergent) are natural ingredients that come directly from the Earth but are considered toxic and should be handled with care. On the other hand, Castile Soap and Vinegar are both natural ingredients AND non-toxic. So, I can’t say my home is now “non-toxic”. I’ve simply improved my cleaning choices by either choosing natural ingredients or safer ingredients – not always both.
Disinfectants, All Purpose & Glass Cleaners
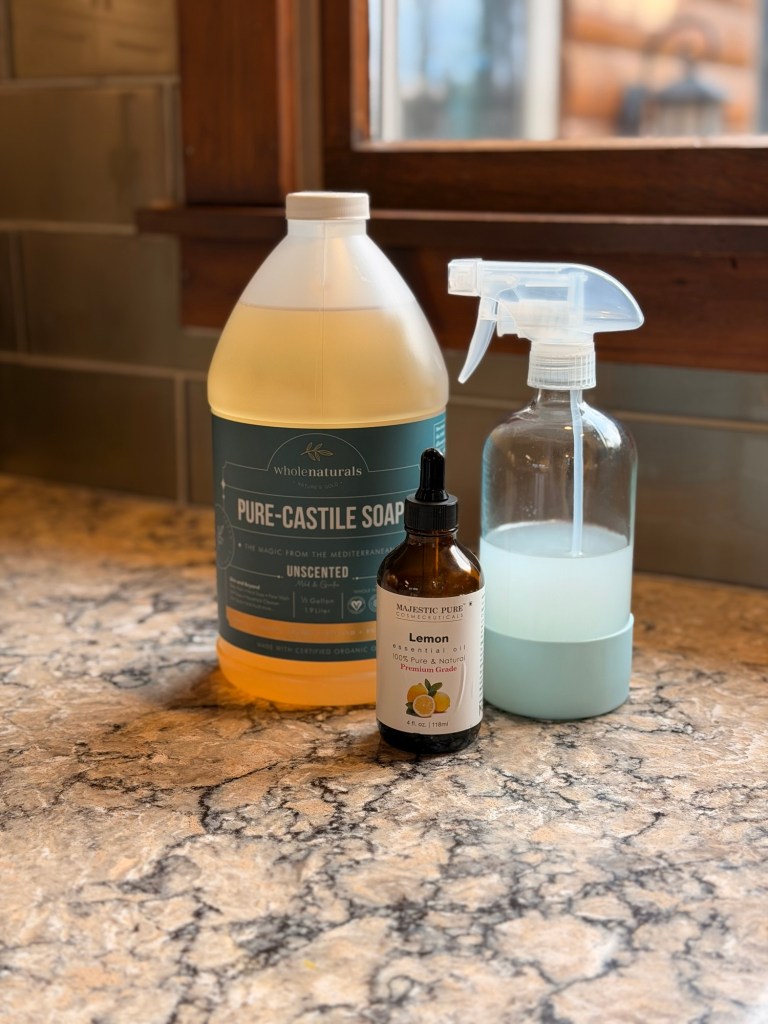
The first switch that I made was creating my own homemade All-Purpose cleaner. The recipe is simple: 1 tbsp Castile Soap (Linked Here), 1 cup warm water & 10-15 drops of lemon essential oil (Linked Here), all in a glass spray bottle (I love these bottles!). I use it on just about everything in my home. Before I made the switch, I was using a “natural” all-purpose spray that still had ingredients I couldn’t pronounce—and barely worked. Honestly, it felt like I had paid $6 for scented water. That was the moment I realized I needed something cleaner, safer, and actually effective. During a deep dive on the American Lung Association website, while learning about the health risks of common household chemicals, I came across this simple recipe. Castille soap is both natural and non-toxic and works great with lifting dirt and grime build up. It is not antibacterial but according to the CDC it works just as effectively as antibacterial soaps. But by adding the lemon essential oil, a natural and non-toxic antibacterial ingredient, I feel safe using this all-purpose spray for the scariest of messes. Best of all, I feel totally comfortable using this spray around my toddler. I even hand her the bottle sometimes and let her help wipe the counters, so she feels included (and she loves it).

For my stainless-steel appliances, windows, and mirrors, I use a simple vinegar-based cleaner: 1 part water + 2 parts vinegar, with a few drops of essential oils so my house doesn’t smell like a bag of salt-and-vinegar chips (I’ve been using this Lavender scent). Vinegar is the age-old cleaning staple your grandmother swears by, and for good reason. It’s not only great at leaving something sparkly clean without any streaks, but vinegar also contains antibacterial properties. I like to use it as a second step sometimes for the more questionable cleanup jobs.
Price Breakdown: I paid $28 for a 64 Fl oz bottle of Pure Castile Soap on Amazon. Since each spray bottle uses just 1 tablespoon, you can get about 128 bottles of cleaner out of one jug, bringing the cost of Castile soap to about $0.21 per bottle. A bottle of lemon essential oil cost me around $10. It’s harder to calculate per bottle since drop counts vary, but my best estimate is about $0.10 worth of essential oil per batch. That brings the total cost of a homemade all-purpose cleaner to under $1 per bottle making it safe, effective, and incredibly affordable!

Laundry Detergent
The next cleaning product that has given me “the ick” for the longest time is the laundry detergent that I use. I’ve bounced between the typical gooey brands of Tide and Gain for the amazing smell they put off. But I’ve always wondered about their ingredients and if they promote using way more than we need to with their massive measuring cups. Is this another gimmick from consumerism America? On top of that, I constantly struggled with getting the sweat smell out of my gym clothes. I eventually started adding Borax as a booster… which led to another question: Why do I need a “booster” for detergent that’s supposed to work on its own? The recipe I’ve found includes: 55 oz box of washing soda (Linked Here), 64 oz baking soda (Linked Here), 65 oz box Borax (Linked Here), 2 bars of Fels-Naptha soap (grated – Linked Here) and 20-30 drops of essential oils (Lemon Essential Oil). I mix all this up in a bucket and store it in large glass containers. I add 2 tbs of the mixture to a full load of laundry and the recipe has worked shockingly well. My clothes smell fresh, look clean, and I no longer need a separate booster. Cost-wise, this recipe is comparable to the big-name detergents you see on store shelves, but the ingredients are far simpler and mostly natural. The only outlier is the Fels-Naptha soap, but you can easily swap it for a Castile bar (Found here) to make the recipe completely natural. Also, back to that giant measuring cup, most of us are probably using way more liquid detergent than we actually need. With this homemade mixture, I know exactly what’s going into our laundry and exactly how much I’m using. I feel better about reducing my plastic waste and I’m no longer questioning the mystery goo I pour over my family’s clothes.
Price Breakdown: This recipe makes approximately 194 loads. For the price of what I paid for the ingredients, the entire mixture comes out to about $23.
Dish Detergent
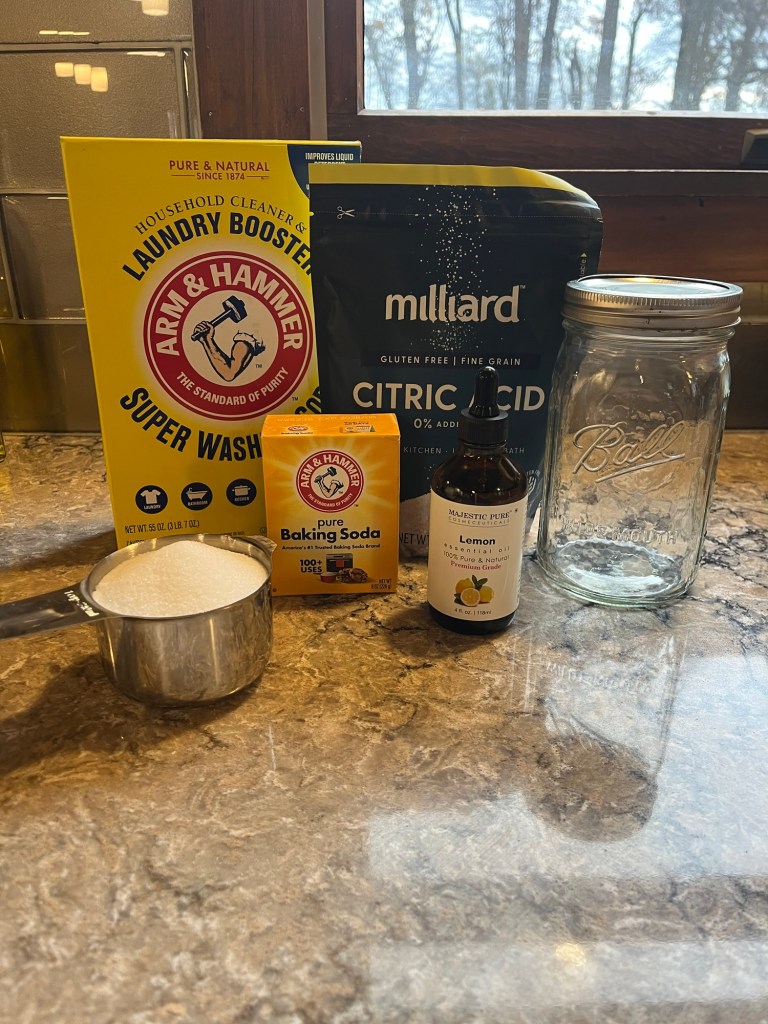
I blame social media (in a good way) for waking me up to the reality of what’s actually in many popular dishwasher detergents. I know I’m not the only one who has seen those viral videos showing pods bursting into microplastic particles that end up all over our dishes…and eventually inside our bodies. Once I saw that, I couldn’t unsee it. My first thought was: Okay, so how do I make my own? The recipe I used was: 1 cup washing soda, 1 cup baking soda, 1 cup salt, ½ cup citric acid and 30 drops lemon essential oil. It worked perfectly for the first few loads but since my home uses hardwater, it started to create a film over my plastic food container lids. I tried the recommended fix of adding vinegar to the rinse compartment, but it did not improve. From what I’ve read, this recipe is incredibly successful for many people, so I suspect it’s just my water system. I still think it’s worth trying because the ingredients are clean, natural, and so much healthier than traditional pods.
When the homemade route stopped working for me, I started searching for store-bought options that were still safe and plastic-free. Branch Basics and Truly Free came up again and again as top choices. Pricewise, they’re definitely more expensive than the toxic pods most of us have used for years and any homemade recipe: Branch Basics sells a bag of 40 tablets (On their website) for $15 where Truly Free sells a bag of powder (On Amazon) that produces 25 loads for $17. Name brand pods sell for about $20 a container that make about 47 loads. Even though the cost per load is higher, I personally feel the trade-off is worth it. These brands are cleaner, effective, and don’t coat my dishes, or my body, with microplastics. For me, a small jump in price is a small price to pay to keep my family a little safer.
Reusable Mop Heads & Floor Cleaner
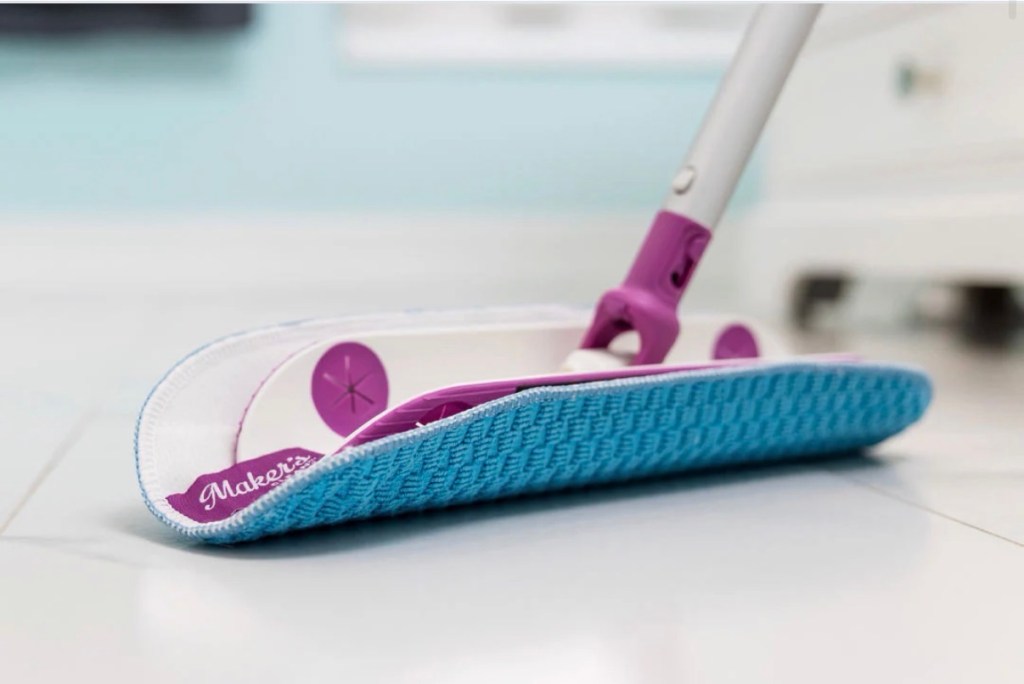
Swiffer disposable mops were always my go-to for quick cleanups. In every home I’ve lived in, I never had enough hardwood flooring to justify buying anything more heavy-duty. Our current home still has mostly carpet, so sticking with Swiffer felt like the easiest choice. But then I started thinking about how many disposable pads I go through in a single year. All that waste…headed straight to a landfill. On top of that, the chemical smell from the cleaning solution was so strong that I had to wait until my daughter wasn’t around to mop, which was nearly impossible, because she’s almost always home with me. That’s when I stumbled across the Makers Clean YouTube channel. It completely changed the way I clean and where I found their reusable microfiber mop heads. The floor cleaner recipe I use for my laminate floors is: ½ cup water, ½ cup vinegar, ½ cup rubbing alcohol and essential oils. I mix this into a spray bottle and spritz it as I mop. Yes, there’s a hint of vinegar at first, but it fades quickly—and the floors end up streak-free and clean. Best of all, I can safely use it while my daughter is playing nearby without worrying about harsh fumes. The other non-toxic option I researched was a steam mop, but these are not recommended on hardwood or laminate flooring as they can cause damage. So for now, the reusable microfiber mop system has been the safest, most effective upgrade for our home.
Price Comparison: Reusable mopheads are not new, but the quality can vary. You can find them from anywhere between $10-$100. Either option you go with, you will be saving hundreds of dollars on disposable pads and reducing your footprint on the planet.
Better Cleaning Methods – Less Waste
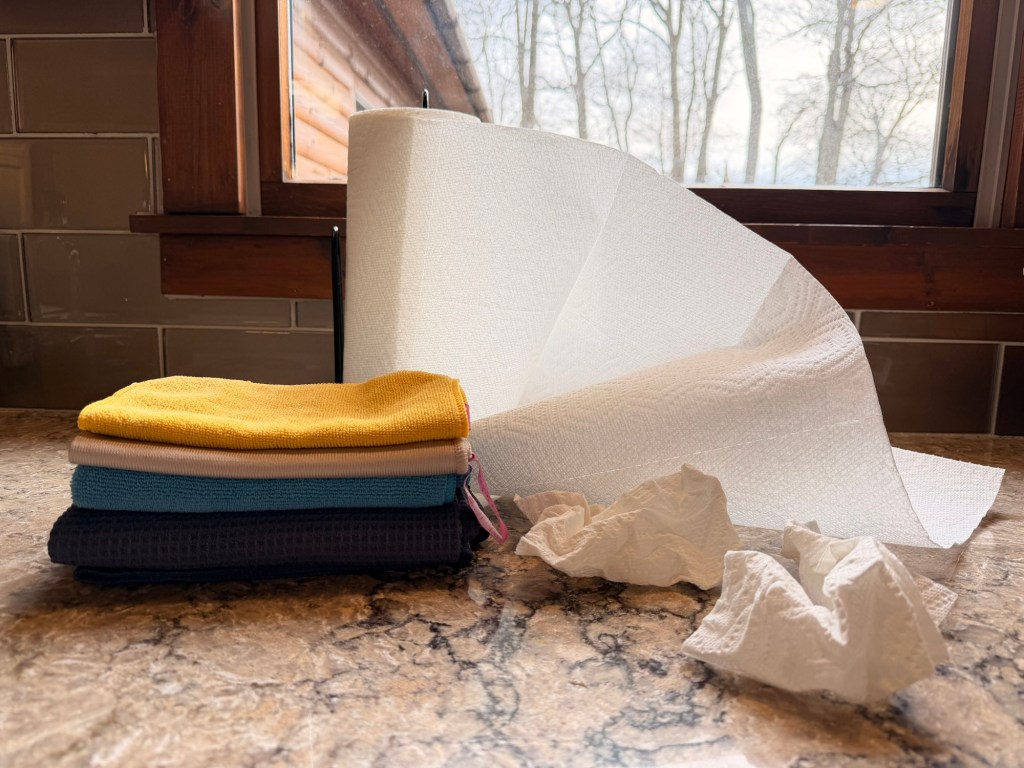
Lastly, I am embarrassed to admit how many paper towels I used to go through during my regular cleaning routines. Deep down, I always knew there had to be a better, less wasteful way to clean, but convenience won every time. Eventually the guilt caught up with me, and it pushed me into researching more sustainable methods. Some were new to me, and some were things I probably should have been doing all along. For bathroom sinks, vanities, and showers, I replaced paper towels with dedicated sponges and brushes. One of my favorite tools is actually a toothbrush as it reaches all the tiny corners around faucets and fixtures that paper towels could never fully clean. I also invested in a handful of high-quality microfiber towels for general cleaning and drying throughout the house. I’m convinced these towels are professional cleaners’ best-kept secret (Find them on Amazon here). In the kitchen, I spray and wipe surfaces with a microfiber towel and rinse it as I go—even on my appliances. Then I follow with a clean, dry towel for a streak-free finish. These simple switches have completely changed the way I clean. My home feels like it’s getting a true wash and I’m no longer contributing to mountains of paper towels and Lysol wipes. It’s cleaner, greener, and honestly…so much more satisfying.
There are still so many areas left for me to explore on this journey toward a less toxic home. A couple on my list are liquid dish soap and toilet bowl cleaner. For dish soap, a simple mix of 1 part liquid Castile soap to 10 parts water works beautifully. And for the toilet, you can pour 2–3 cups of white vinegar into the bowl, let it sit for a few hours, then scrub as usual. I’m also excited to find healthier alternatives to traditional candles and air fresheners – another sneaky source of chemicals we breathe in every day. But even though I’m still learning and still improving, I’m genuinely proud of the changes I’ve made so far. These shifts have allowed me to clean freely around my toddler without worrying about harsh fumes. They’ve dramatically reduced the amount of waste our home produces. And they’ve given me something I can’t help but share with friends and family. My biggest takeaway is simple: that most of our homes can be cleaned with such minimal, natural and safe ingredients and companies have complicated the art of cleaning in order to make a profit – and possibly to keep us sick. But we, as mothers and caretakers, don’t have to accept that. With small, intentional changes like these, we can create healthier, safer homes for the people we love most.
Do you have any other cleaning tips and tricks not mentioned above? Do you have any recommended cleaning products you swear by? Leave in it the comments below!
*This post contains affiliate links. As an Amazon Associate, I earn from qualifying purchases.

What a great and practical way to promote healthier habits and sustainability!
LikeLike